What Is Open-Ended Art Anyway?

April 28, 2011

This post will eventually become a seperate page on this blog.

Although I am sure many of you have ideas about what open-ended art is, I am thinking some may stumble upon this blog without any information.

The basic idea of open-ended art is that the end product is…..open, hence the term “open-ended.” The purpose of an open-ended experience is to allow your children to use their imagination, as well help them gain skills which will allow them to express their ideas visually and orally with confidence.

A purist would say the only art experiences that are open-ended would be those that do not define the end product for the child, or the materials that should be used, or the processes that should be explored. For example, a purist may have an art bin in their house that contains a variety of materials that thier children can explore freely to create whatever they want.

I tend to be a little more grey in my thinking, and feel open-ended experiences fall on a spectrum of, well, of openess.

I just had a discussion with someone about foam craft kits, normally I cringe when someone puts those three words together. They make me think of 25 identical penguins staring at me from a pre-school wall. However, this person explained that one can purchase a foam craft kit, for example, “bugs.” To make the project more open, instead of giving one child the parts for the lady-bug, and one child the parts for the bumble bee, you would simply put all parts on a table and let the children create their own imaginary bugs. In this case you have defined the process, the materials, and even in someways the product,a bug. I would still say this is..open..there is some choice for the child, and their work won’t be corrected.

I tend to focus on defining the process I want the child to use, and maybe providing some inspiration for creating, for example showing my children pictures of flowers before begining a water color picture. Or perhaps showing them a series of pictures from Picassos blue period before having them collage with blue papers or painting with blue paints.

What do you think open-ended means?

Do you have any sites you like to go to for ideas for open-ended art experiences?

My Magic Garden

March 21, 2011


These beautiful gardens were made with repurposed tissue paper from gifts, lots of watered down glue, cardboard for canvass and black markers.

Take a walk in a garden or look at photos of flowers for inspiration. Have your child draw flowers or a garden or really whatever they want on the cardboard. Have them tear their own pieces of tissue paper and glue the pieces over the drawings. Water down some glue in a pan and have them use a roller to roll glue over the top of their artwork – this will smooth down the tissue paper flat, allowing you to see the image underneath. The more glue, the better.

Screen Print

March 10, 2011


For this activity you will need:

*  one piece of plastic screening (if it’s not in your shed, you can get a piece at the hardware store)

* painters tape (masking tape)

* small roller

* Construction paper

* Paint

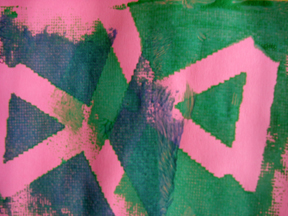
First have your child use pieces of the tape to create an image on a screen(s). Then place the screen on top of the paper, roll a contrasting color over the top of the screen. When your child picks up the screen they will see their image on the paper. Have your child continue to print with the same screen or remove the tape and start again. This activity was done with children ages four and five.

School Projects

March 9, 2011

Obviously I love open ended assignments, but occasionally the product does matter…

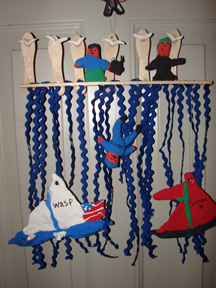
I have officially entered the world of school projects, as my son brought his first project assignment home. He had chosen to create a mobile to represent a favorite scene from “Stuart Little.” Suddenly my mind (as aged and experienced as it is) opened to all of the creative solutions for his project.

My brain told me that this was his project, but my gut wanted to “steer” him in the right direction. So, I called a good friend to ask her what she had done before, to ask how much “guidance” she has given in the past.

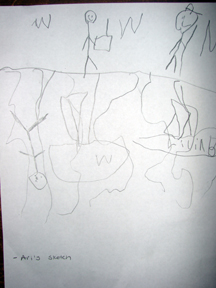
She told  me to have my son sketch what he wanted his project to look like, then to use my experience to show him how to make his vision a reality. For example, when he drew his vision of his mobile, he said he wanted to paint the wall blue behind it to show the water. I had to explain that he couldn’t take his wall to school with him on the day of the presentation, and then asked him what else he could use. He chose blue fabric, but when we went to the craft store he zoomed right to the ric-rac (I love this boy!)

He also drew seagulls above the mobile….we then had to discuss how to make that happen.

Anyway…the project looked great in the end, and it was his vision, not mine.

Water Color Collage

February 5, 2011

This was a two part activity. For it you will need one piece of card stock, a variety of white absorbent materials (coffee filters, doileys, paper towel, construction paper,) water color paints and brushes.

First have your child cut or tear pieces of the absorbent materials and collage with the glue stick on to the card stock. After it dries, have your child paint with the water colors onto the collage. Another option is to reverse the process – have them paint on aborbent materials, then have them cut and collage with what they had painted.

We will enjoy these now, then I am thinking of recycling them around mothers day. Either giving as is, letting them draw flowers on top with black marker, or  havung them use a large flower hole punch to cut flowers from their picture to glue onto cards.

Toilet Paper Tubes and Tape

January 29, 2011

Nuff said – This occupied my four year old for over an hour. He taped and retaped many times. I thought about extending the experience by having him paint his sculpture (x-wing fighter.) He was more interested in building more things.

Rings

January 26, 2011

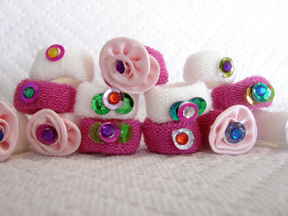
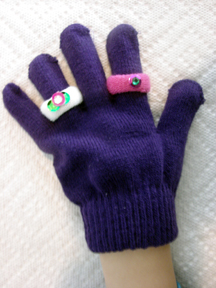
Yet one more awesome craft from Family Fun Magazine! We made these as a birthday gift for a 5 and 8 year old. My older son was able to manipulate the sequins, but I had to help my four year old with everything but the ribbon roses. I am thinking it would have been better for him to use buttons and larger sequins. (Don’t you just love my use of a paper towl roll as a back drop!)

Begin by finding some mismatched magic stretch gloves (or buy them for $1.00 per two pack.) Cut the fingers of one of the gloves. Then cut the tips off of each finger so you have about a 1 inch tube. Stretch the tube, and eventually the edges will curl in on themselves. Then flip the tube inside out for a ring.

Tacky glue on sequins, beads, etc. Wear mitten rings with mittens (p.s. that is my son modeling the rings.)

Patchwork Quilt

January 21, 2011

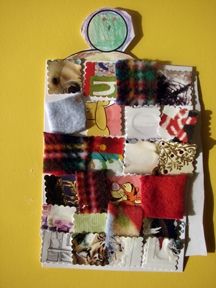
The image above, “Patchwork Quilt,” was created by Romare Bearden in 1970. To see more of his work click on the image above to go to the Romare Bearden Foundation. Romare Bearden used pieces of scrap cloth to create this collage.

Using this work as inspiration, kids created thier quilts with cut pieces of felt and the front sides of old  Christmas cards. They glued pieces of thier choosing, onto the backs of  the Christmas cards.

Basic Salt Dough Recipe and Other “Trapped Inside” Activies

January 11, 2011

The snow is coming!!!!! Yay!!!!!

Here are some ideas for occupying your little ones:

1. Basic Salt Dough Recipe: 1 cup flour, 1/2 cup salt, 6 to 7 TBSP of water, 1 TBSP Vegetable Oil
Keep dough in an airtight bag and refrigerate to keep it fresh. Consider also adding: peppermint, vanilla or cinnamon extract, unsweetened cocoa powder and food coloring. Allow you child to use, plastic forks and knives, cookie cutters, rolling pins, shells, rocks..anything that has texture for cutting and stamping.

2. Fill shampoo bottles or spayers with water and food coloring. Let your child spray and squirt in the snow.

3. Collage with puzzle pieces (from puzzles that are already missing pieces of course.)

4. Torn paper collage. Let your child tear up pieces of paper, then glue them to another piece of paper. Then add crayons for a mixed-media creation. Better – tear up those holiday cards you have been meaning to recycle. Best – well, I think it’s best, repurpose old artwork by letting your child tear or cut it and make a new creation with it.

5. On the left hand side of this page (the home page) is a category called “Super Crazy Easy.” All activities in this category are super crazy easy to do. Perfect for indoors. Take a look.

Of course, before doing any of these activities, enjoy the snow and play outside until your feet, fingers and lips are frozen.

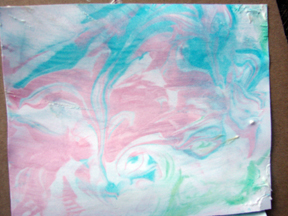
even MORE fun with shaving cream : Marbelizing

January 5, 2011

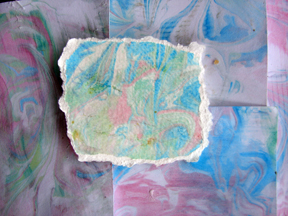
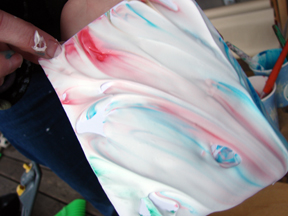
Create marbelized papers with this simple technique using shaving cream.

You will need:

Shaving cream, a paper plate or tray, a piece of cardboard, paint, brushes and paper (construction paper will work best, but cardstock will also work.)

First: Put a 1 inch layer of shaving cream on your paper plate or tray. Level the shaving cream with your cardboard. Children should gently paint designs on top of the shaving cream. Demonstrate “gentle” for your child. You don’t really want them digging in to the shaving cream.

Second: Gently swirl paint and gently press a piece of paper on to the design

Third: Lift off the paper. You will see shaving cream blobbed all over the paper. Adult should then scrape shaving cream off of the paper with the cardboard. Once the shaving cream is dry you can rub off remaining shaving cream with a towel.

Warning: Activity likely to devlove in to a shaving cream explosion

Email me!